Custom Data Entry

With PedPro it is possible to add data fields (max 200), customize the pedigree layout to include those fields at relevant places on the pedigree, and organize the fields within data entry window as needed.
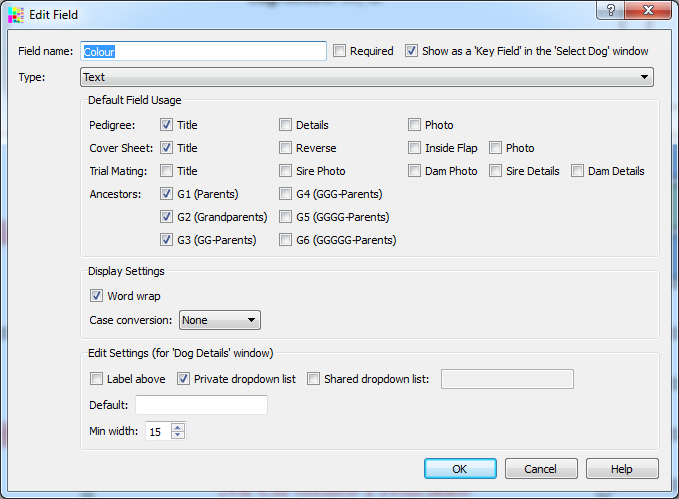
To add a new data field select File|Settings, move to the User Fields tab, then click the Add button.
Choose the field type. Most often they will be plain 'Text' fields but it is also possible to have date, percentage, number, choice, boolean and multi-line text fields.
Depending on the field type various display settings and editing settings can be chosen. The Display settings affect how the field value is displayed in a pedigree e.g. with text fields they can be forced to be shown in upper case. The Editing settings control how data is entered for the field. E.g. for a text field it is normal to use a plain text box but it can also have a drop-down menu of previously entered values.
It is possible to control where on the pedigree, if anywhere at all, the field is to be placed. E.g. if a field for coat color is added, it may be desirable to have that appear in the title box for the subject animal and in every ancestor generation shown. But with, say, a field for registration number or breeder, it may only be suitable to have it appear in the title box. To control this there is a Default Field Usage section with checkboxes to control where the field is to appear.
Once all the fields have been set up, the next step is to set their placement within the Record Details window.
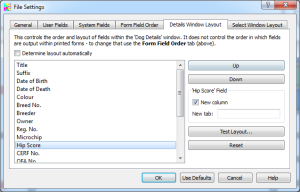
This is controlled using the Details Window Layout tab of the File Settings window.
This tab shows a list of all the fields excepting for the name, sex and photo (the positioning of these fields is not configurable).
All the fields listed will be added to the Record Details window in the order given.
By default, PedPro will try to arrange the fields automatically. This does a reasonable job but you may well prefer to manually set the placement. To change that order, first uncheck the Determine layout automatically box and then:
- Move fields up or down the list. To move a field, select it then use the Up or Up button.
- Force a field to start a new column in the Record Details window - check the New Column checkbox.
- Force a field to start a new dialog tab in the Record Details window - just enter the tab label in the New tab box.